Exchange the optical sensor OPX-1 or 2
The following procedure handles the exchange the
optical sensor OPX-1 and OPX-2.
 Used in: Any
kind of SCAN and P250
Used in: Any
kind of SCAN and P250
Requirements
· 1.5mm hex key wrench
· Service program
In
the service program
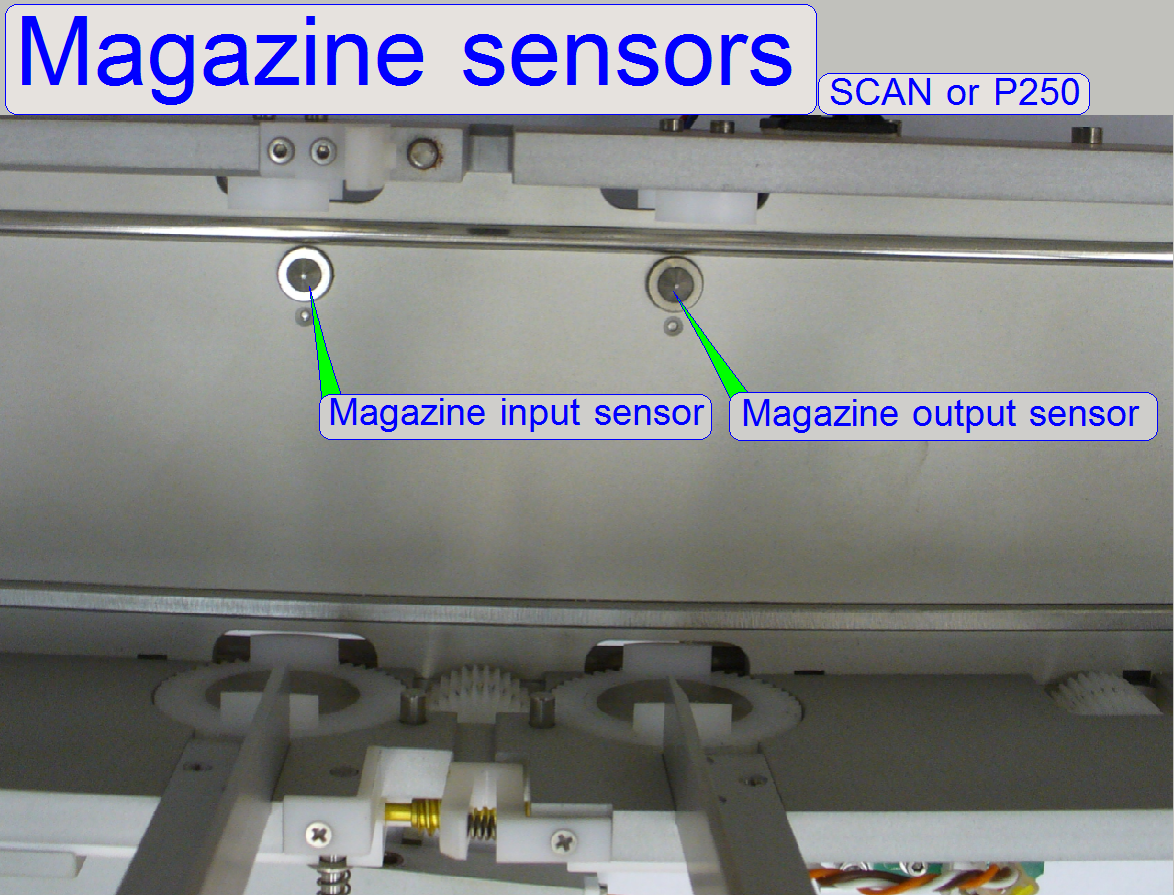
· The magazine input sensor is named as “Left magazine
sensor” and
· The magazine output sensor is named as “Right magazine
sensor”.
Check the sensors before dismounting
· Check the sensor pin for glass shards, dust or any
other dirt; the pin should move very easily.
· Check the sensor cable for right connection of the
wires to the connectors
· Check the correct cable position in the DC-Controller
· With the service program check the functionality of
the sensor and its acting path.
· Hereby, the sensor moveable part should move very
easily and the acting range should be about 0.5mm.
· The sensor state “attached” and “released” should be
clearly distinguished by the weight of the empty magazine.
Because the label
of the sensor cable is different in the SCAN versions and in the P250, the “X”
stands for the electronics version.
· In MIRAX
scanners and SCAN150 the cable label and so, the name of the sensor also, is
OPC-1 and OPC-2.
· In Pannoramic scanners the cable label is OPF-1 or
OPF-2.
· In Pannoramic 250 scanners the cable label is OPJ-1 or
OPJ-2.
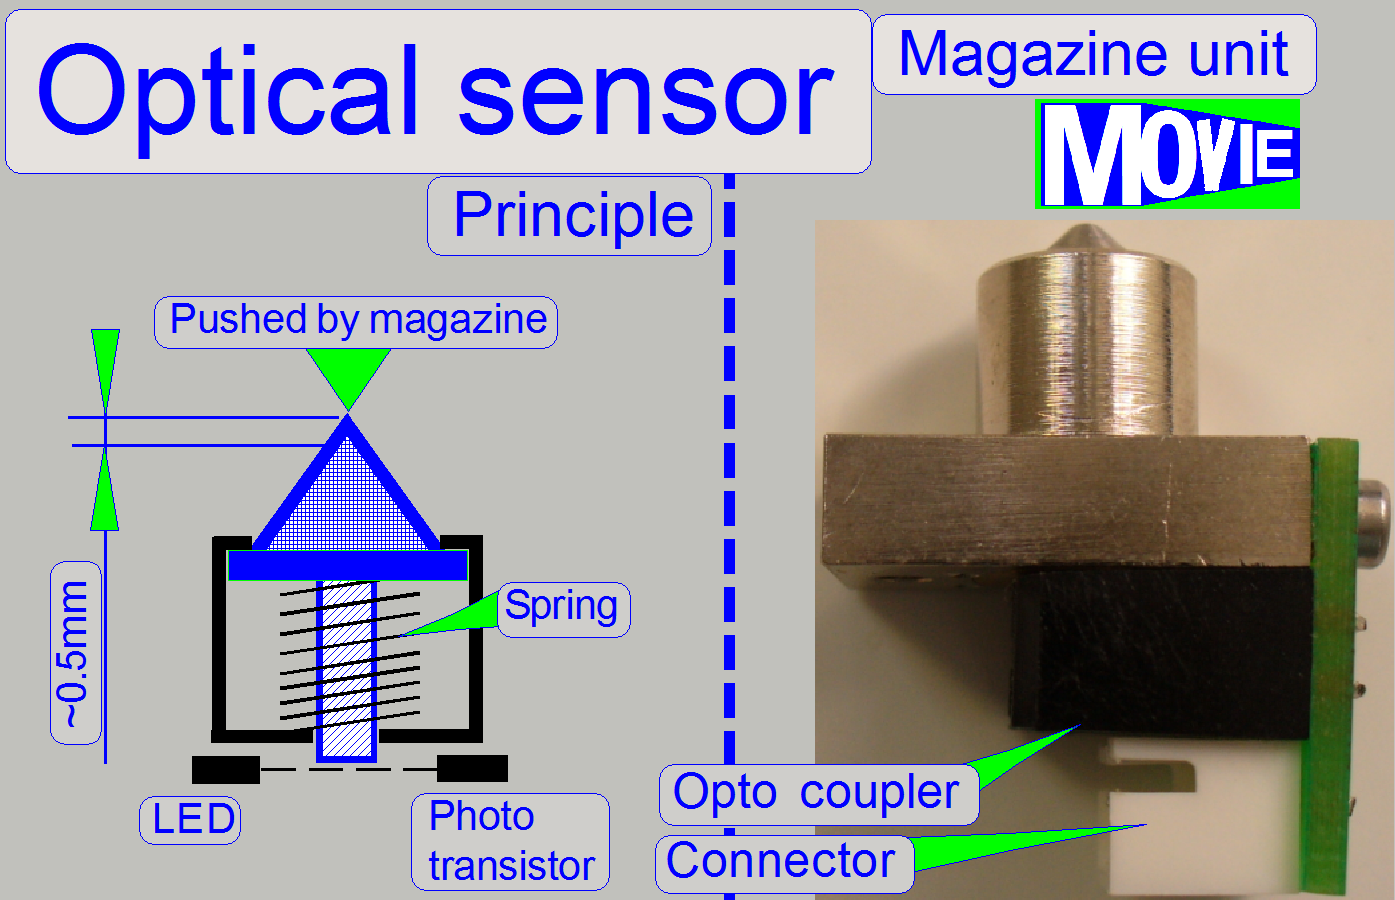
· The type of the sensor, its construction and working
principle is identical in all magazine unit types.
![]() “Magazine
unit_SCAN”, “Magazine
input sensor_SCAN”; “Magazine
input sensor_P250”; “Power
and control_Optical sensor”
“Magazine
unit_SCAN”, “Magazine
input sensor_SCAN”; “Magazine
input sensor_P250”; “Power
and control_Optical sensor”
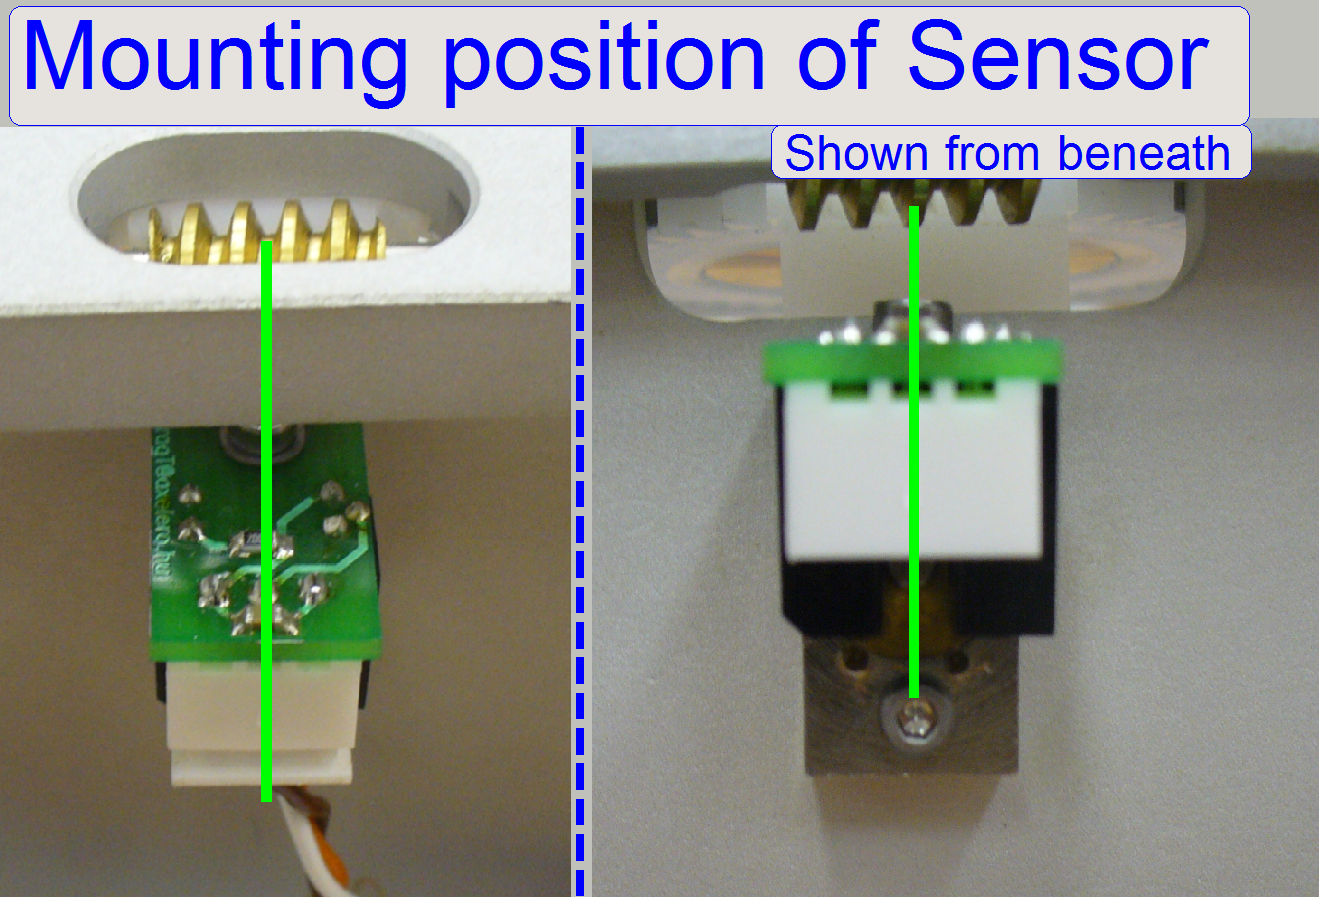
Remove the appropriate sensor
 The main aspect of this exchange procedure is, that
the magazine unit should not be dismounted during exchange of any optical
sensor.
The main aspect of this exchange procedure is, that
the magazine unit should not be dismounted during exchange of any optical
sensor.
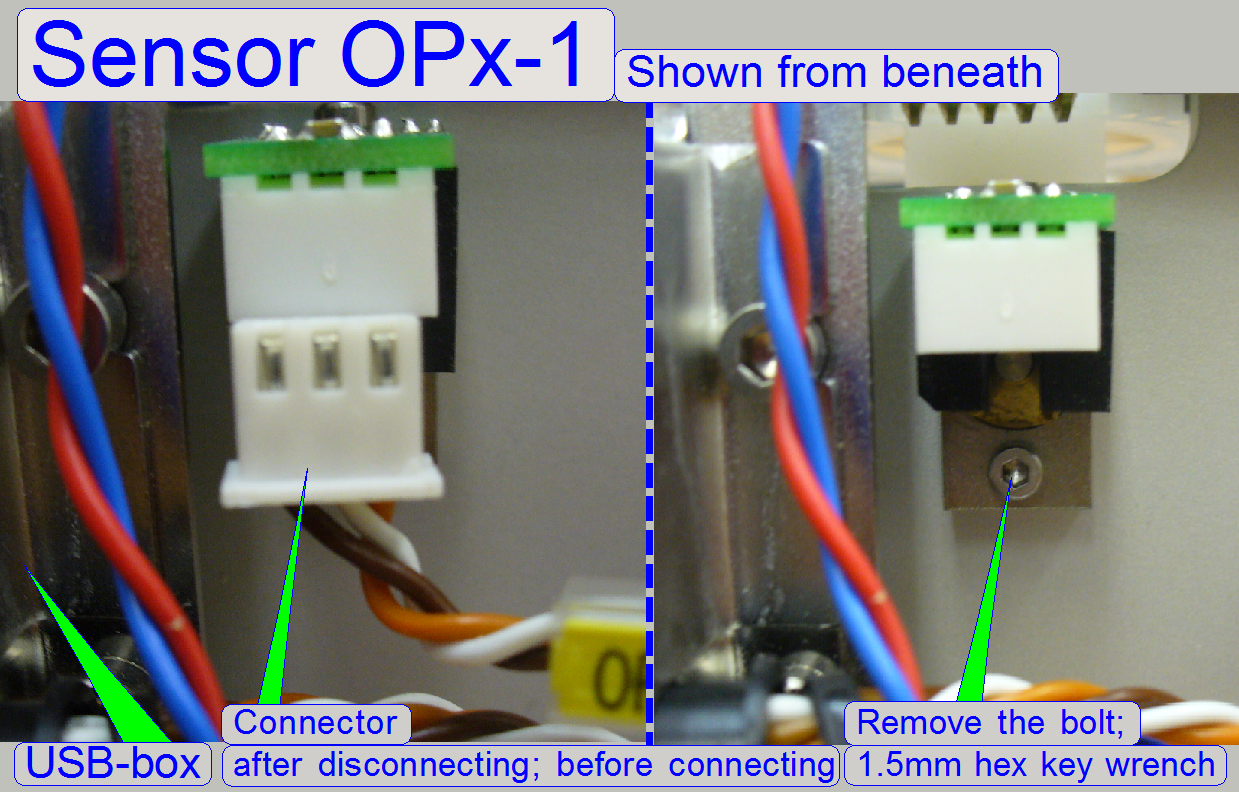
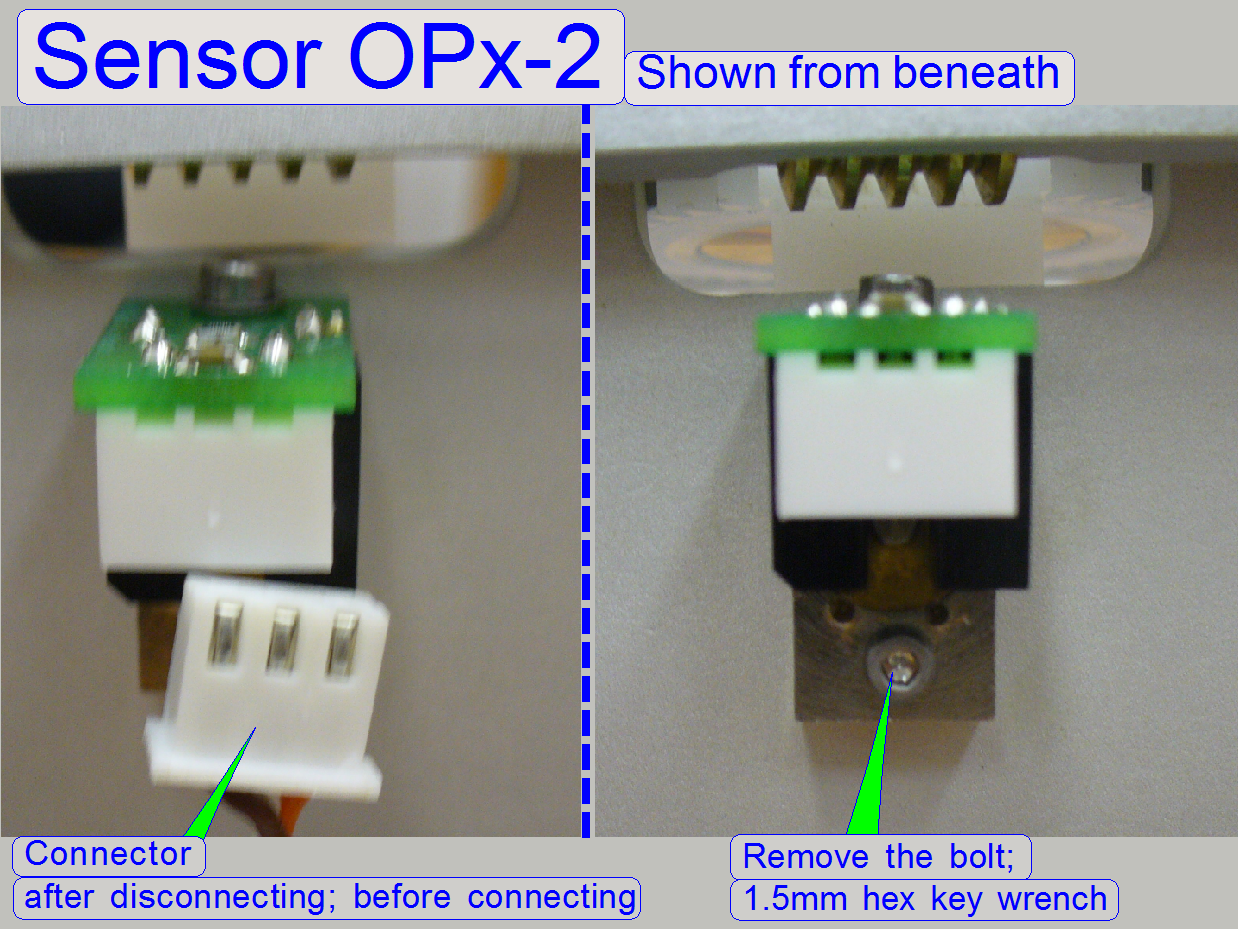
· Switch off the power supply
· Disconnect the sensor cable header
With a 1.5mm
hex key wrench remove the mounting bolt of the sensor; after this, the sensor
can be easily pulled downward, out of the mounting hole.
Before mounting
the sensor, check its correct switching with the service program!!
· The sensor should have a very small acting range!
End